Wednesday, January 19, 2011

Party Favors

Hello all!!  This week at Sweet Sassy Diva we are making projects for Valentine's Day or Birthday!!  So I'm getting a head start on the party favors for my daughter's Valentine's party at school next month!  Yay!!
Recipe:
Kate's Kitchen Cricut Imagine Art Cartridge
White Cardstock
Chestnut Roan Colorbox Chalk Ink
Adhesive
1 Inch Circle Punch
Scotch Tape
Curling Ribbon 
The hearts are from the stock images on the Imagine flood filled with patterns from Kate's Kitchen.  I used four different sizes and left two of the hearts blank to keep them white.
 The hearts are cut at 3.0, 2.5, 2.0 and 1.5.  I used the auto-fill feature after choosing the patterns and sizes.
 Here they are after they were printed and cut out.
 Inking the edges of your projects makes a huge difference!!  I love Chestnut Roan!!
I wanted to be able to tie the hearts around a snack or package of candy.  I punched out some 1 inch circles and attached curling ribbon to the circle.
 I used Scotch tape to attach the ribbon to the circle but then used the adhesive to attach the circle to the heart.  
 The snacks that I used are Mini Rice Crispy Treats.  They are super good!!
Curl the ribbon and you are finished!!
Have a great week!
-Carissa

Saturday, January 8, 2011

6 Most Important List

Hello all!!  This is Carissa!  This week at SweetSassyDiva we are making something recycled, repurposed or a project made with a new item received for Christmas...  My project is a 6 most important things to do list that will be kept on a clipboard.  One of my goals this year is to balance my time more!!  I've started planning our meals again, keeping a list of cleaning chores to do everyday and now this list will help keep me on track even more!  Everything will be on this clipboard!!  Every night before bed I will put the six things that are at the top of the list that must get done the following day.  After they are completed then I will turn the tag over.
My new item received for Christmas is the Fabulous Finds Cricut Cartridge!!  I wish I could say that I used the flood fill feature on my Imagine to make this project but I'm not updated yet with the most recent update.  I used four sheets of white cardstock and a small scrap of another white cardstock.  Sweet!! 
Recipe:
Fabulous Finds Cricut Cartridge
Best Friends Imagine Art Cartridge
White Cardstock
Scoring tool
Crop-a-Dile or Eyelet setter
Eyelets
Ribbon
Adhesive
Chestnut Roan Colorbox Chalk Ink
Gypsy - Optional
(I used the Gypsy because my Imagine is not updated yet)
  The red and yellow sheets are double sided!  The image from the Fabulous Finds cartridge needed a front and back...
 For the four sheets of white cardstock I used the Print Paper feature with the Best Friends Art Cartridge.  I love the clouds!!  So dreamy!!!

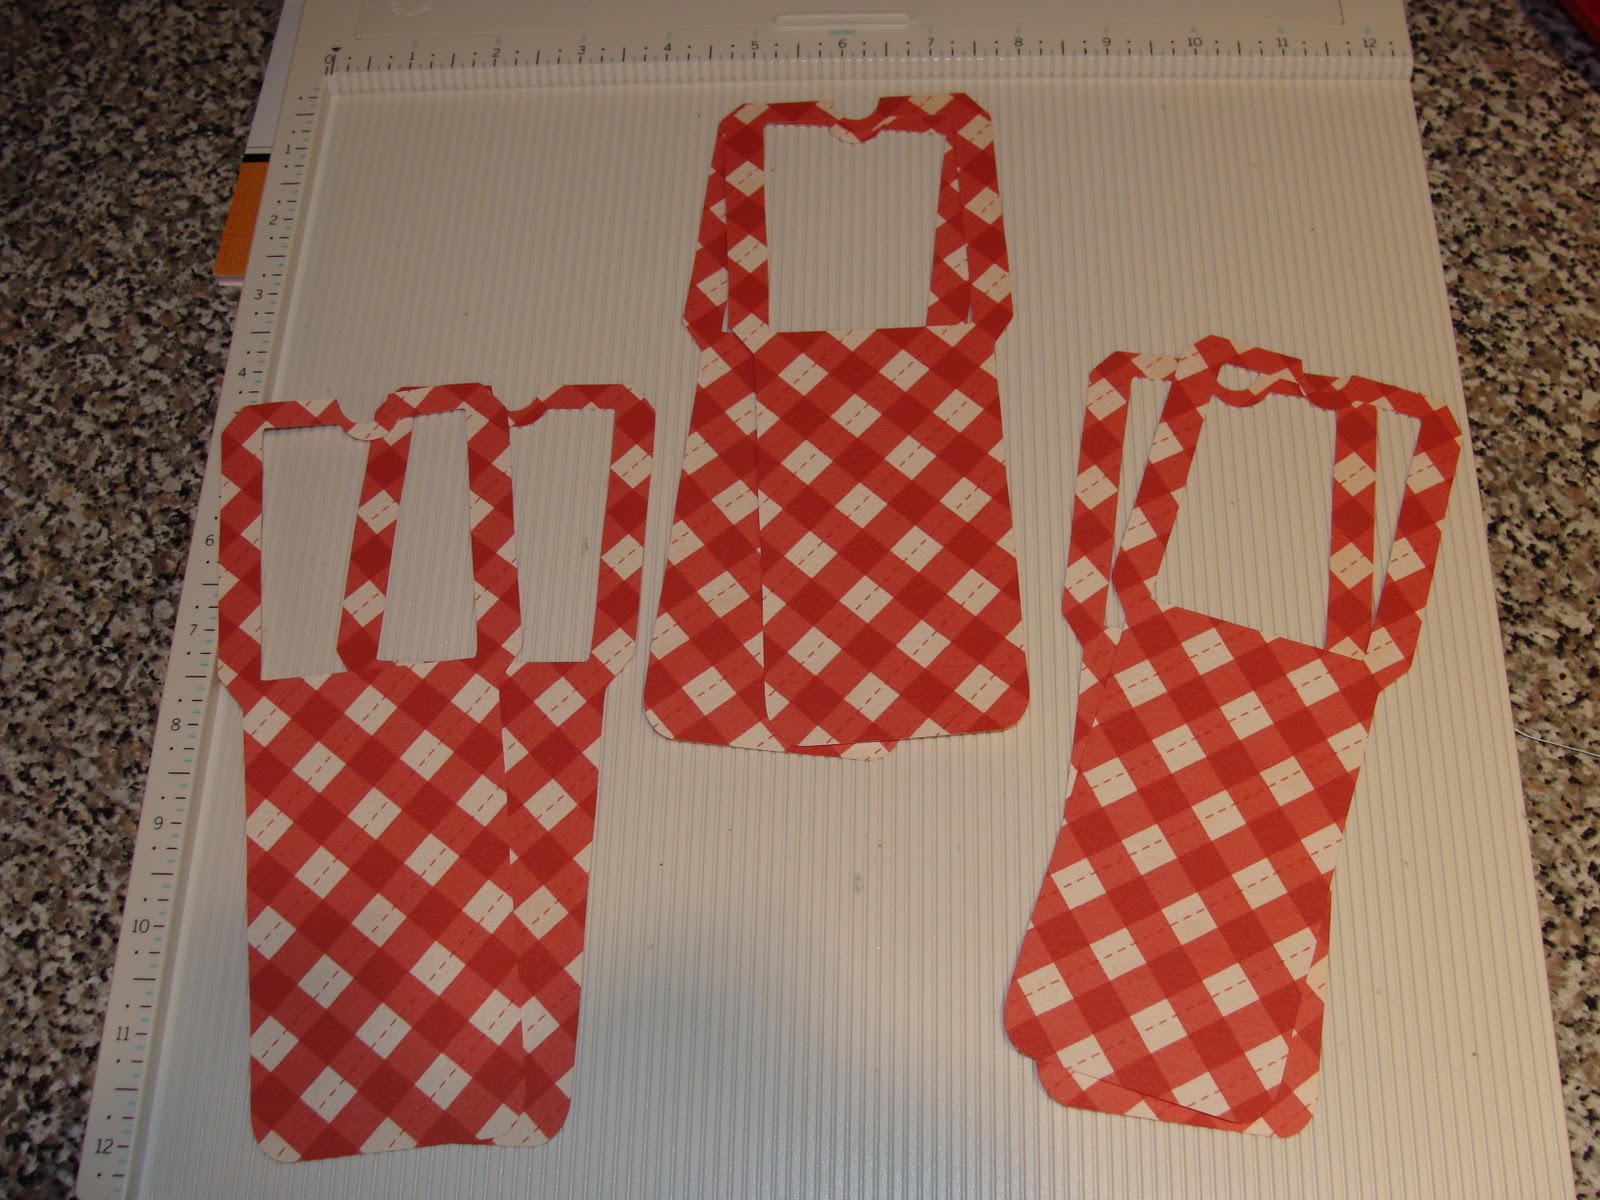
 This image is found on page 211 on the Fabulous Finds Cricut Cartridge.  I cut six of the at 3 inches.   
 I cut three at a time so I have a couple of nice scraps from this paper!
 Here they are ready to get scored on my Martha Stewart scoreboard!
 I wanted to make it a little flatter so I folded the flaps around the back.  It will be hidden anyway!! 
I cut the inserts from the printed blue cardstock at 2 1/4 x 3 3/4.  Rounded the top two corners to match the pocket.  Then used my Crop-a-Dile to punch a hole and add an eyelet for the ribbon.
 I used lots of glue to make sure that my pocket will lay flat.  All sides and one strip down the center. 
I printed a couple of images at the end to complete my project.  This is where the scraps of white cardstock were used.  The flowers are cut at 0.8 and 1.0 inches.  The bird was cut at 0.7 inches.  I used the layer feature so I could delete the images that I didn't want to use.  Also, I used the true size feature for both.  The edges were inked with Chestnut Roan chalk ink.
Have a great week!!
-Carissa

Sunday, January 2, 2011

Happy New Year!

I hope you all had a fantastic first day of 2011!!!  Have you set goals or made resolutions??  It's a brand new year!!  Make every moment count!!
In 2011...

  • I will balance my time better. 
  • I will make healthier choices for me and my family!  I started Weight Watchers again a few weeks ago when the new PointsPlus program started.  One pound per week!
  • I will make memories with my family and record them!  Starting my first scrapbook is huge for me!!  Also, I'm planning to take one picture every day this year
  • My husband and I will read the entire Bible!  We started a chronological reading plan today!!
Wow!  Actually writing my goals down feels awesome!!  They have been circling around in my head for the last few weeks!  

Thanks for stopping by and good luck with everything you all do in 2011!!
-Carissa

Thursday, December 23, 2010

Happy Holidays!!!

Hello all!!  Hope you all are having the best holidays ever!!  We are having fun visiting with family this week!  We are heading to our next destination tomorrow evening!!  I think we will be getting some snow also!! 

Here are some pictures of my other projects!!  I finally made a zipper pouch!  And it's lined!!  Yay!!  I'll be making more soon so I can get better with the zippers!


 This next project was made for a gift exchange with my fiber friends at our monthly Fiber Friday Christmas Party!!  We have knitters, crocheters, spinners and weavers every month that get together for a wonderful evening!!  It is so much fun!!  I love making these loop handle bags from the Singer website!  It's reversible!!  Also, included a Namaste Buddy Case and Chibi needles! 


I've packed several knitting projects that I can work on while traveling!!  I've finished one already just need to attach the buttons!!  Yay!  Still have a blanket, vest and cowl to work on!
Happy Holidays!!
-Carissa

Tuesday, December 14, 2010

Christmas Mini Album

Wow!!  I can't believe that Christmas is almost here!!  I love this time of year!!
I still need to decorate a little bit more but it will be done soon....

The challenge last week for the design team at SweetSassyDiva was to create a mini album!!  I really enjoyed seeing the different albums that the design team made!  It made me realize that I really wanted some kind of binding system...  So I watched HSN on Sunday night and purchased a YourStory!!  I cannot wait for it to arrive!!

Here is my mini album...  Click HERE for the details...
In the next day or so I will be inserting pictures of my family to give as a Christmas present to my husband's grandmother.  


First opening...
Pockets were made by taking a 5.5x8 piece of cardstock and score in the middle at 4 inches.  
Fold in half and then fold one side down to create your pocket.  
Place sticky tape on the bottom and side as shown in the picture below...  
Cut your mat pieces and adhere.  
I had a little oopsie with the pink paper that probably will be covered up with an embellishment or picture.
Second opening...
Cutting, layering and punching!!  I got a new punch!!  Love it!!
Third opening...
I had to be really careful with the cuts on this opening...  I probably could have used my Gypsy but I'm haven't mastered that yet.
Fourth and fifth opening...  
Super simple cutting and layering!!
I used almost the entire stack of paper and I will use the rest for a card to match.  Sweet!!
Thanks for stopping by!!
Have a great week!!
-Carissa

Monday, December 6, 2010

WINNER :: Distressing Tool and Buttons!!!

Happy Monday!!!


Thank you all for hopping along with us over the weekend!!!  It was super fun!!!  I appreciate all of your kind comments and I will definitely be checking out your blogs as well!!


The winner of the distressing tool and buttons is...  BunnyFreak

BunnyFreak said...


Would love a distressing tool and buttons.

Saturday, December 4, 2010

SweetSassyDiva ::: Post-it Blog Hop

Hello all!!!  Welcome to the Post-it Blog hop! Grab your beverage of choice and enjoy the wonderful projects as well as a chance to win some blog candy along the way! The challenge is to use the Post-it Paper in a unique project.

If you have arrived here from Rebecca's blog then you are in the right place!  If not, CLICK HERE to start at the beginning.  Leave a comment on every stop along the way for a chance to win Post-it Craft Paper!!!  This paper is so much fun to work with and play with!!  It is so forgiving and allows do-overs when needed!!

Layering...  Self-Adhesive...  Wonderful!!!
Paper:  My Minds Eye (patterned) and Core'dinations (card base)
Paper:  Golden and Nantucket Post-It Craft Paper
Chestnut Roan Colorbox chalk ink
Bling

Next project is a basketweave design holiday card...
I love basketweaving and this was super easy to do!!
Paper:  Christmas paper from my stash (patterned) and Core'dinations (card base)
Paper:  Crimson and Evergreen Post-it Craft Paper
Handwritten sentiment using Zig super fine point pen

This was so easy and quick!!  Cut squares, peel and stick!!!  Great for kids!! 
My six year old would love to do this!!  Planning on a Christmas break activity!!!
Paper:  Lime, Crimson, Nantucket, Evergreen, Golden, Citrene, Lucky and Cobalt Post-it Craft Paper
Buttons and Ribbons from stash
Large cup (50 cents at a store closing sale)

Thank you so much for taking the time to visit my blog today!
Here is a list of all the blogs in the hop.

BLOG CANDY!!
Remember to leave a comment at every stop to enter to win
Post-it Craft Paper from our super awesome sponsor!! 

You could also win some blog candy right here as well!! 
Paper Distresser and an assortment of buttons!!!

Next Stop is Jamie!!
Have fun and Enjoy!!
-Carissa